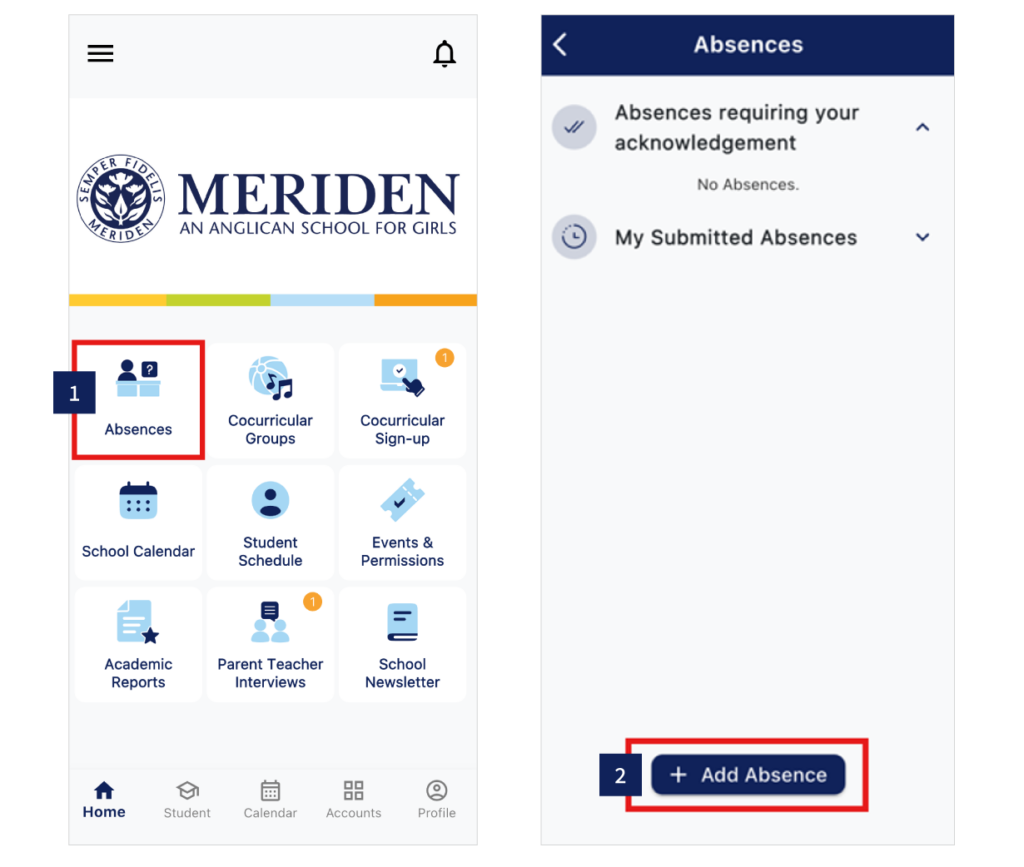
1. Click Absences icon.
2. Click the ‘+ Add Absence’ button.
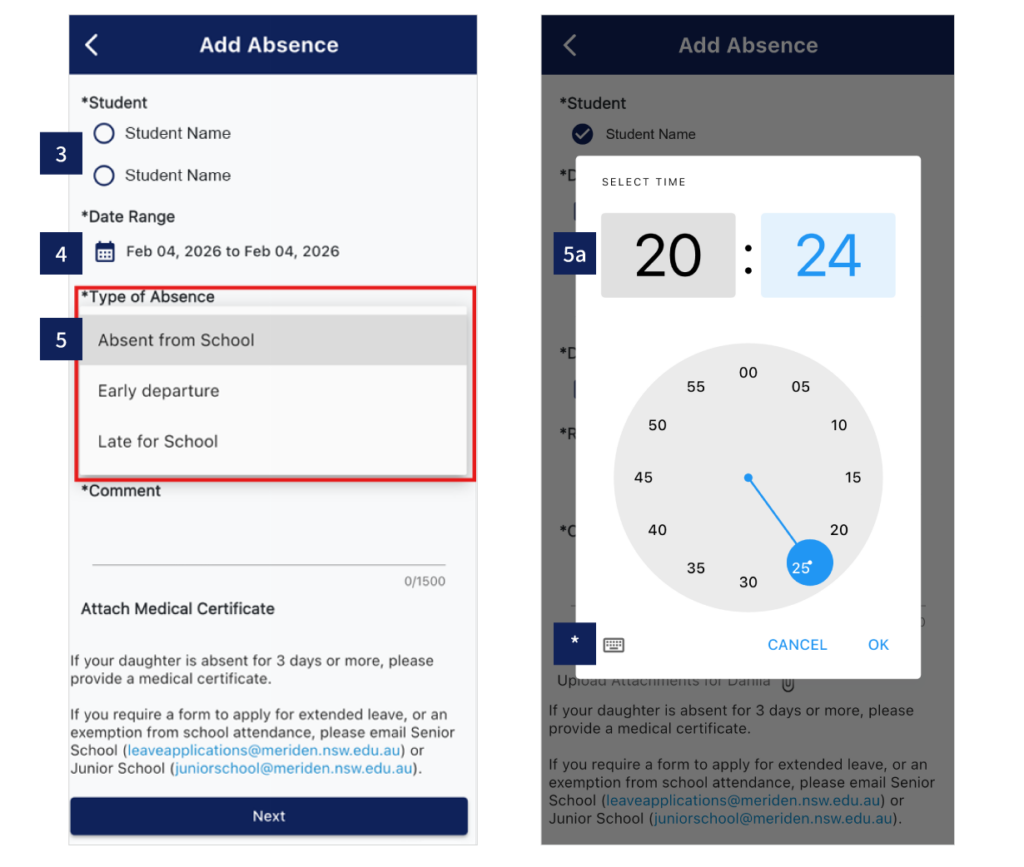
3. Select Student.
4. Enter Date Range.
5. Choose Type of Absence from drop down menu.
5a. If your daughter is arriving late or leaving early, enter the time.
* Click to switch to digital clock.
6. Select Reason for Absence from drop down menu.
7. Enter short explanation under Comment.
8. Attach medical certificate if required.
9. Click ‘Next’.
10. Click ‘Submit’.
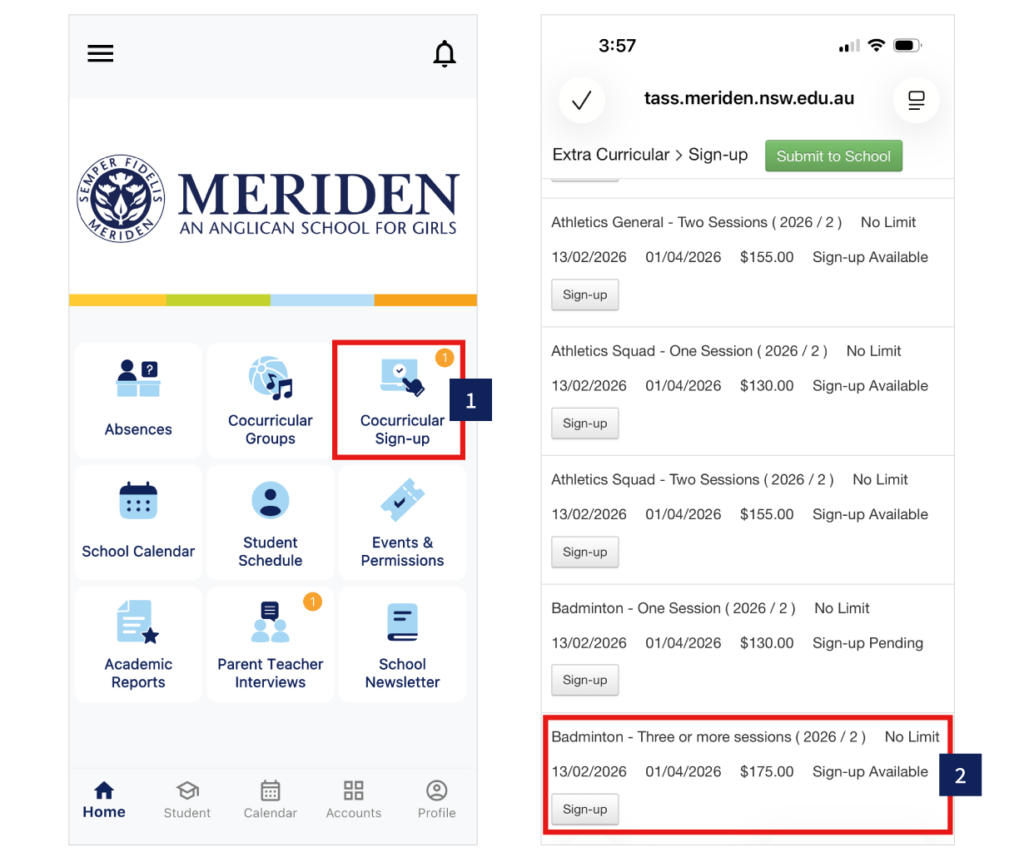
1. Click Cocurricular Sign-up icon.
2. Click Sign-up under the relevant activity.
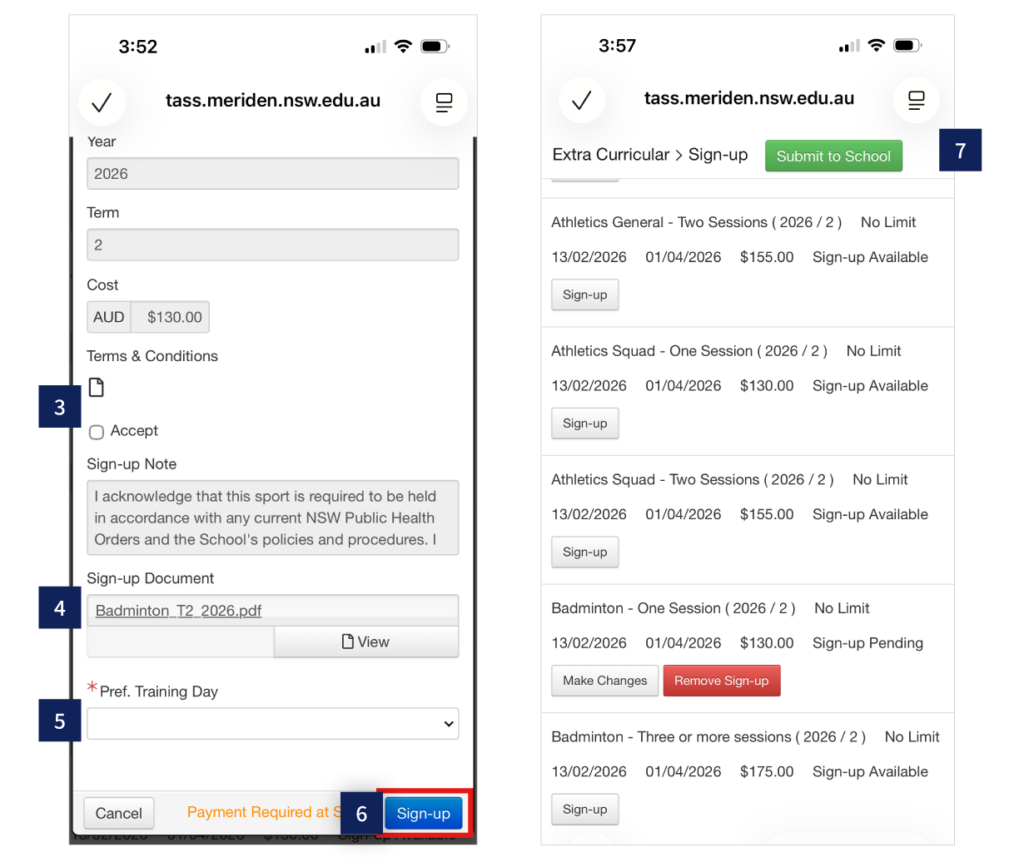
3. Read and Accept Terms & Conditions.
4. Click ‘Sign-up Document’ for activity details.
5. Make sessions selection (not always relevant).
6. Complete by clicking blue ‘Sign-up’ button.
7. Click green ‘Submit to School’ button to make payment.
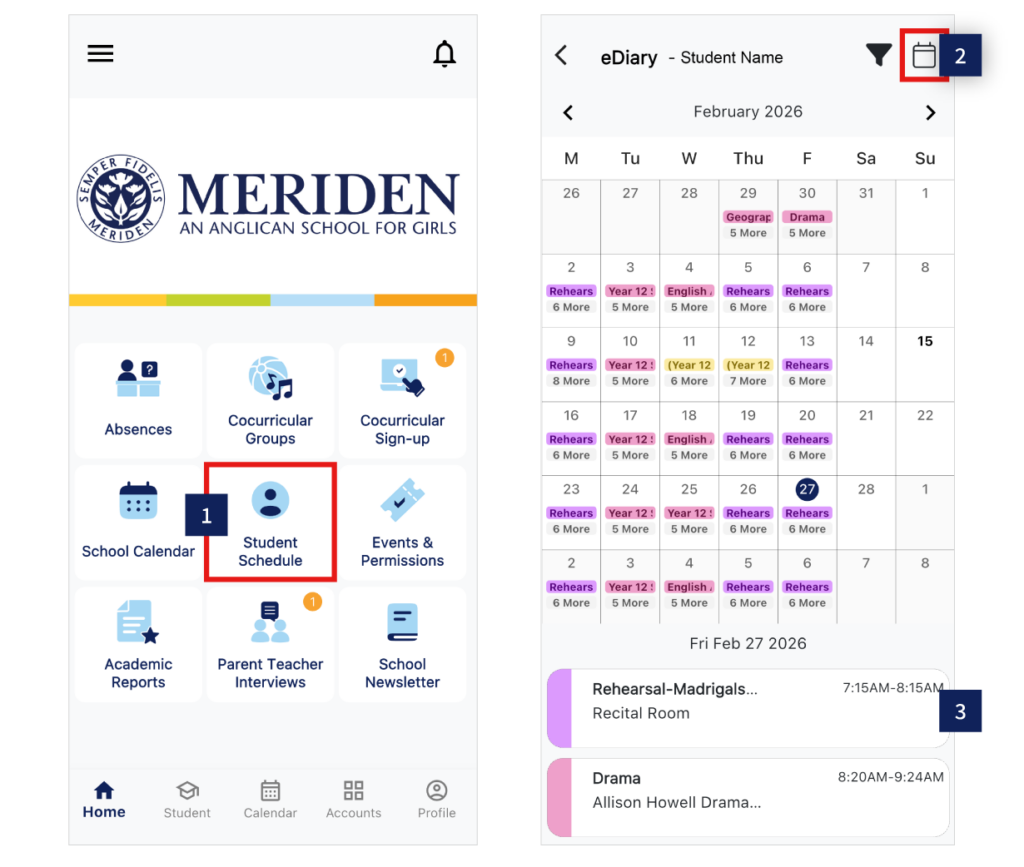
1. Click Student Schedule icon.
2. Click Calendar icon to toggle between month view and day view.
3. Scroll down for your daughter’s daily schedule: classes (Senior School), cocurricular activities and school events.
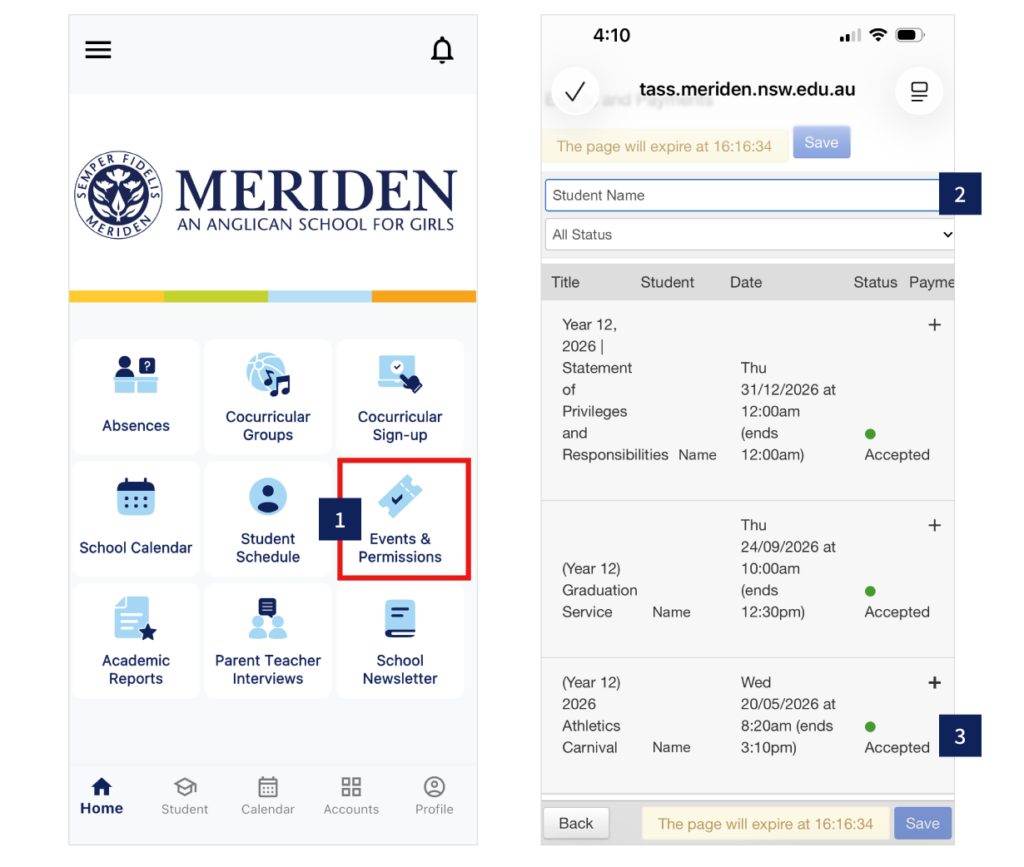
1. Click Events & Permissions icon.
2. Filter by child, or event status.
3. Tap on event to see additional information. Scroll down to accept or decline.
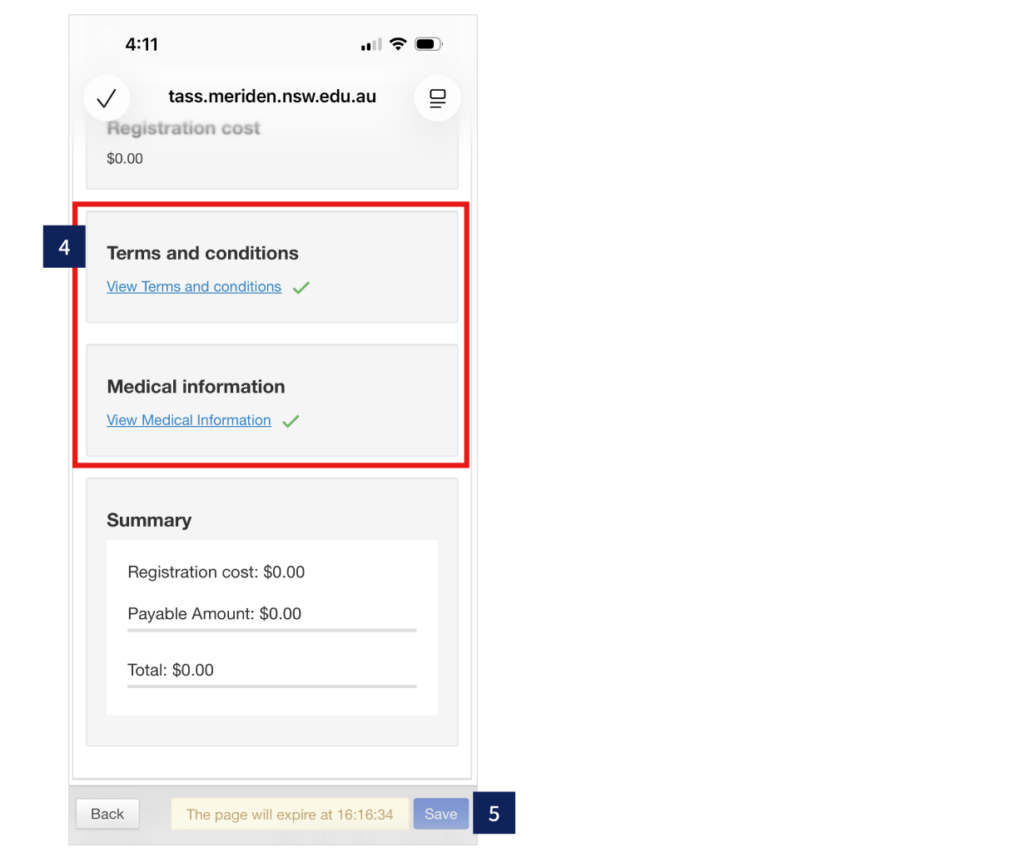
4. View cost (if relevant) and confirm Terms & Conditions and Medical Information.If required, follow the prompts for payment.
5. Click blue ‘Save’ button at the bottom of the screen.
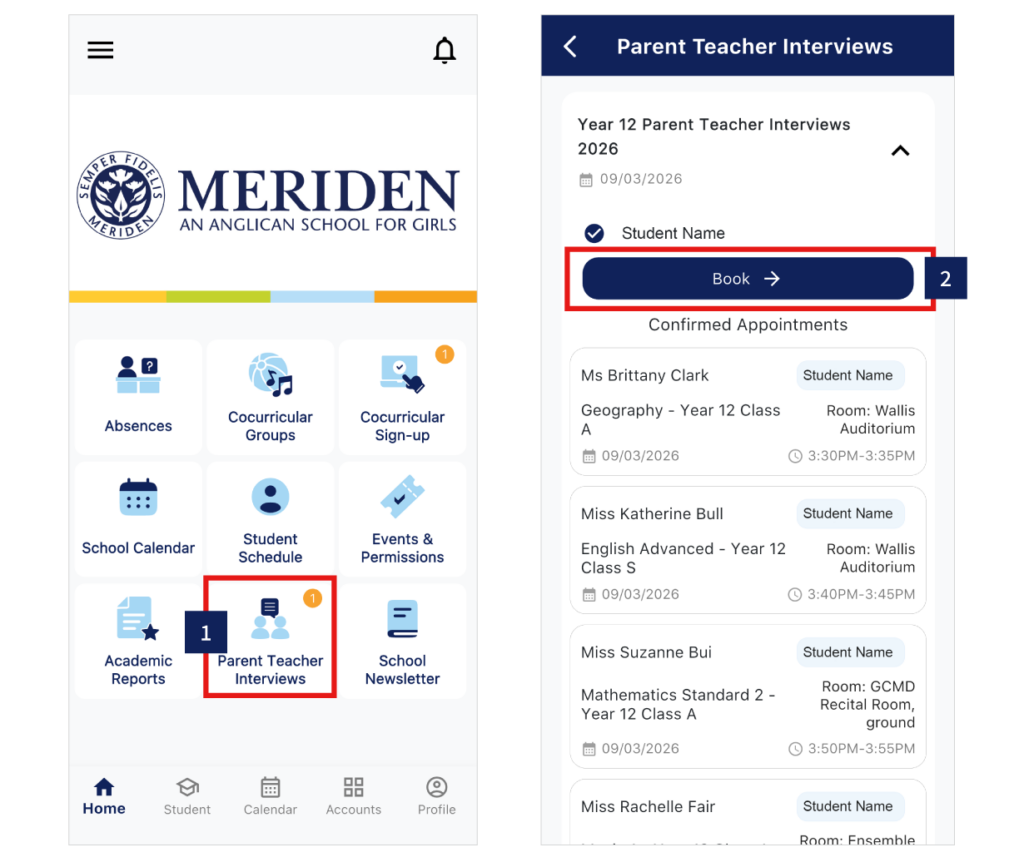
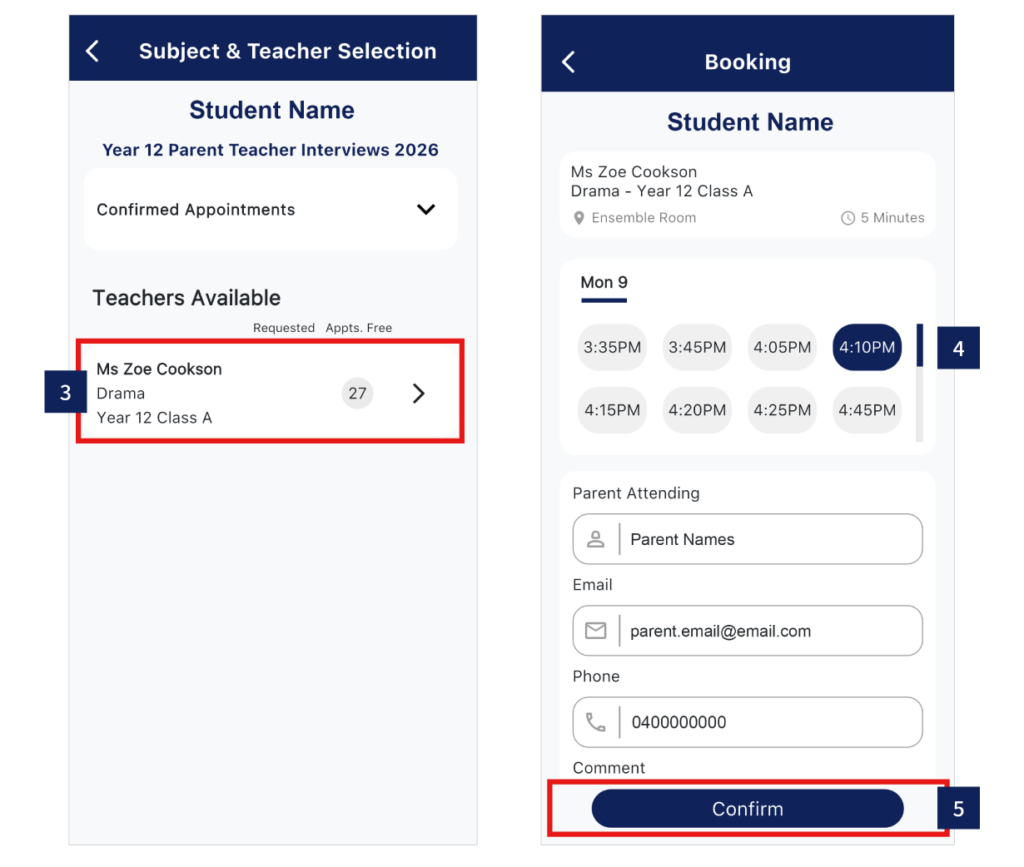
1. Click Parent Teacher Interviews icon.
2. Click ‘Book’ button to make appointment.
3. Select desired teacher.
4. Select desired time from the appointments still available.
5. Click ‘Confirm’ button, and repeat process until you have booked all your appointments.
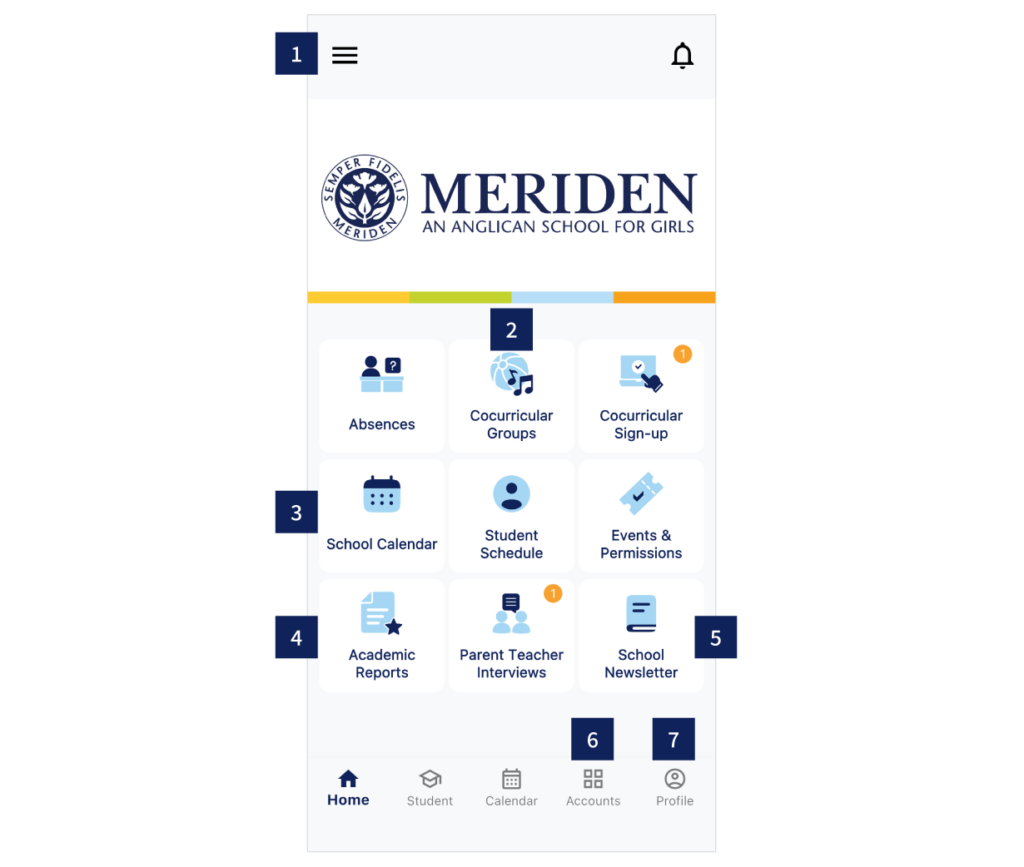
1. Click the Menu bars for school policies, links and key contacts.
2. Click the Cocurricular Groups icon to see all your daughter’s extra curricular details.
3. Click the School Calendar icon to see all school events.
4. Click the Academic Report icon – over time you will see your daughter’s recent School Reports.
5. Click the School Newsletter icon for the most recent edition.
6. Click Accounts for school fee payments & account statements.
7. Click Profile to enable Face ID, update contact details and colour labels.